
We’ll cover setting up your model on this page, importing assets into Mixer, blending layers, and basic masking to create your first Mix! See Quick Start to make a new Mix with the default settings.
Setting Up Your Model
While a plane is selected by default, you can easily switch the type of workflow to a 3D one by choosing a Megascans asset or importing your custom model to Mixer. For this example, let’s proceed with a Megascans asset. By going into the Setup tab, select 3D Asset from the Type drop-down menu. By doing so, you will be redirected to your Local Library’s asset browser for a selection. You can also use Mixer’s Online Library to search for more 3D Assets.

Here you can specify the Working Resolution, which dictates the resolution at which you work in Mixer. You can always export at a higher or lower resolution.
For this example, you can add this statue’s bust to follow the example below or select one of your own for experimentation.

You can also load a Material ID texture, if applicable, by going to the Texture Set Editor. This lets you assign materials and layers to certain parts of your asset using RGB values, which are automatically extracted from the texture. Find these via the ID Mask at the bottom of the layer stack.

Adding Assets To Your Mix
Access your downloaded and bundled free assets from the Local Library tab on the top left. You can download more at any time, either via Bridge or from the Online tab in Mixer.
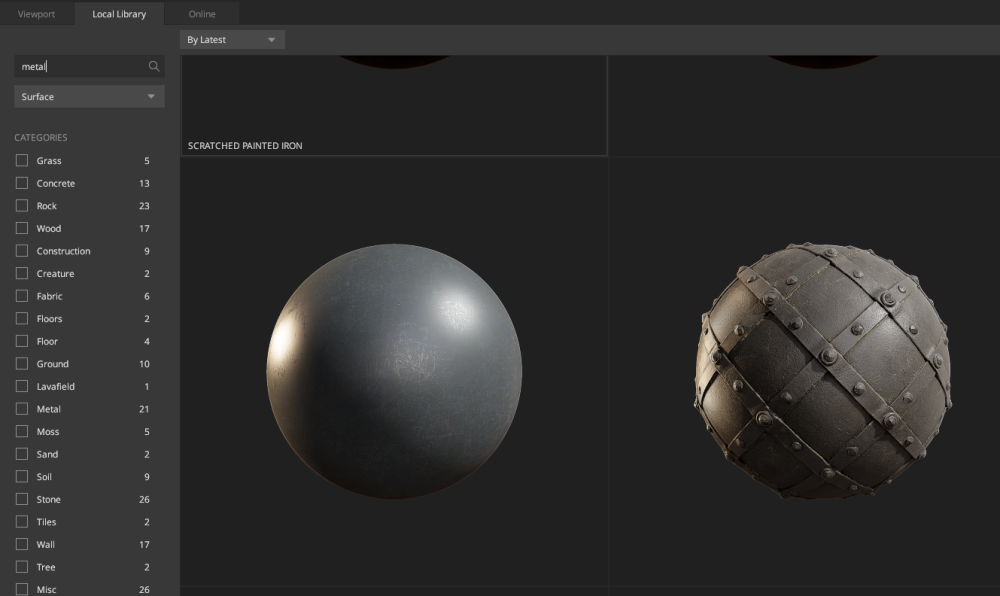
Left-click the material you want to load into your Mix. It will be imported as a Surface Layer, and Mixer will switch back to the Viewport. Hold Alt + LMB + drag to rotate the Mix. Zoom with the MMB/ scroll button or Hold Alt + RMB + drag.

The material will be wrapped to the model by default. You can adjust the level of adherence to the underlying surface by adjusting the Wrap to Underlying slider. In relation to that, you can also adjust the amount of blurring this current layer will cause to the underlying information, including the base textures.
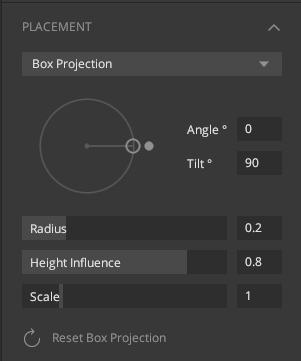
Underneath the blending options are the Placement options. Expand this section by clicking the title. Here you can choose between different options.
- Tiling is a standard application of the textures on the mesh in the 0-1 UV space.
- Freeform lets you scale and rotate the material freely in the 0-1 UV space, which is very handy for decals and atlases.
- Box Projection, the default option, is a hexaplanar project, allowing you to apply materials without noticeable seams. You can control the blending at the seams by adjusting the.
Let’s head down a bit in the list and adjust the reflectance values.


Here you have complete control over the different channels of the material. Each channel can be adjusted individually. Blend mode, opacity, custom maps, contrast, and many other options are available here. By clicking on the circular color swatch next to the expand/collapse arrow, you open up the color picker in which you can specify the reflectance value of the channel.
Reflectance Presets
You can load the accurate PBR values from the Reflectance Preset dropdown to the top-right. This automatically applies the correct reflectance values.

For this example, Copper was selected.

Any adjustments made can be saved as a custom reflectance preset that can be shared and used anytime.
Masking
In this example, we add some oxidization to this new copper style. First, add a new Solid layer and change the reflectance to a teal color.


Next, add a Mask Stack to the layer. Here you will create a procedural mask using noises, real-time generated curvature, and many more components.

This opens up a new type of Layer Stack, in which you can add Mask Components and Modifiers. This stack behaves the same way as the layer stack and is an intuitive way of building materials. For this oxidization, let’s start by adding a curvature component.

This presents you with a curvature component that generates curvature information in real-time with no rendering or waiting time. You can choose which input data Mixer will use to generate the curvature. Each of the settings has its use, but you’ll likely use Mesh & Underlying Mix for this example and most use cases. This takes not only the mesh but also all underlying layers’ details into consideration. Any changes you make below this layer will affect the generated curvature.

Achieve a believable result by adjusting the frequency balance and levels.

At this point, it already looks good, but let’s add some scanned data to the Mix by adding an Image Component to the stack above the Curvature.

With this component, you can now load any 2D asset from Megascans (or any custom asset) to your mask. This will save you from generating the data procedurally and will help add a significant level of realism.

Load an Imperfection-type asset to the Image Component, set the Blend Mode to Multiply, and after adjusting the Range sliders, you’ll get this result:

Repeat the same steps as above, but make the color darker. Invert the Curvature to apply to the cavities instead of creating some grime in the hard-to-reach places.

At this point, you can group your layers, right-click the group and choose Save Smart Material. This will allow you to share and re-use this material in any future project, saving you time and ensuring visual consistency between assets.

Atlases
As a final touch, let’s add a decal. To add a Decal or Atlas, click the New Atlas Layer button at the top of the Layer Stack. This will open the Local tab with the Atlas category pre-selected, letting you quickly browse your locally available Atlases.

This example uses a grungy leak decal. Change the Placement to Box Projection and adjust the orientation so that it runs from top to bottom. Then adjust the Radius to blend and adjust the reflectance values and Blend Mode to combine nicely with the underlying texture information.


In addition to the massive Megascans library and all the custom assets you can add, there are many more properties to tweak. With many masks and painting tools, you can take any basic Mix wherever your creativity desires.