
The setup tab helps establish the working environment for your workflow, either 2D or 3D, and gives numerous options to customize the texturing process.

The Setup Tab has 3 sections:
- Model Settings
- Texture Settings
- Material ID
1. Model Settings
The Model Settings vary according to the type of mesh selected. The following kind
of models can be selected:
- Plane
- 3D Asset
- Custom Mesh
- Shader Ball
-
Plane:
The plane only has one option, which is size. The size of the plane can be selected from the dropdown options, which range from 1×1m to 100×100m.

-
3D Asset:
When selecting the 3D asset option, you will be directed to the Local Library tab, where you can choose your 3D model. Notice in the image below that the 3D asset selection bar is highlighted blue. This means that 3D Asset selection is active. If you navigate to another section instead of selecting an asset or perform any other action, selection will abort. You can click on this bar to start selection again.

Once a 3D asset has been loaded, you will get 2 more options. LOD and Scale Factor. You can now select a LOD for your base maps, as well as change the scale of your mesh uniformly. The actual size of the mesh is displayed below this, as seen in the image.

- Custom Mesh: Selecting this option will prompt you to browse your custom model for texturing. Once loaded, Mixer will show 2 more options. Texture Sets and Scale Factor. Texture Set allows you to define the type of setup your model is based upon. If you are importing a mesh based on a Single Texture Set or multiple Udims, or Materials, specifying the mesh type will help Mixer set up texture sets based on your modeling principle. From the Scale Factor, you can change the scale of your mesh uniformly. The actual size of the mesh is displayed below this, as seen in the image.

- Shader Ball: Shader ball is a sample 3D mesh, which can be loaded by selecting it from the dropdown. It is mainly used for the preview of Smart Materials in the asset library. When you load a Smart Material as a Mix, the Shader ball is loaded along with the Smart Material.

2. Texture Settings

You can select a working resolution from the drop-down in texture settings. Here you can change the active resolution of your Mix at any time. With Mixer 2021, you will have access to ‘Edit Texture Sets’ from this section. The Texture Settings section also shows you the number of texture sets you are currently working on and the number of Base Maps loaded.
3. Material ID
Compared with the previous versions of Mixer that did not support Multiple Texture Sets, the material IDs management has been redesigned. While in the setup tab and at a state where no ID maps are loaded, the default view would point to the Texture Sets Editor for setting up Material IDs.

Once the Material IDs are loaded through the Texture Set Editor, they will be visible under two sections, i.e., “Available IDs” and “Missing IDs.” If there are no missing IDs, the “Missing IDs” section will be hidden. The Material ID section will also point out the number of texture maps from where the IDs are derived.
While loading a map, Mixer automatically generates new IDs from the map and reassigns Unassigned IDs to them if there is a match.

‘Unassigned IDs’ may occur if there are Material IDs checked in the” Material ID Masks”:/mixer/material-ids but do.html not match a color in the loaded Material ID Maps. If a map with colors matching with the Unassigned IDs is loaded, the Unassigned IDs are automatically matched and assigned to the Available IDs listed.
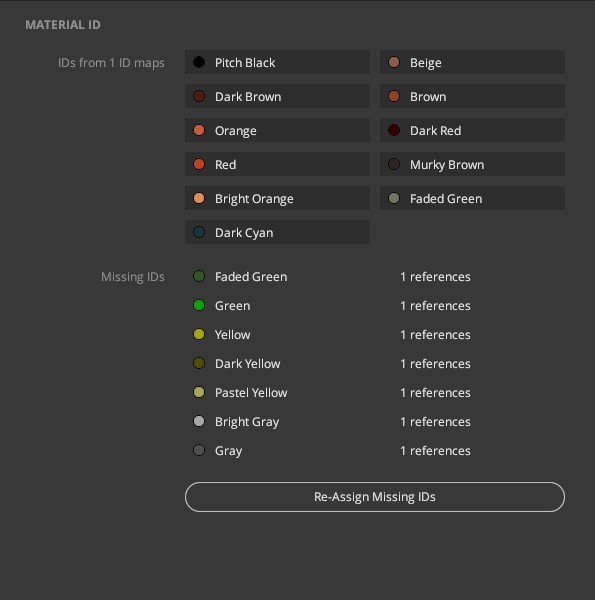
These Unassigned IDs can be reassigned to another ID by right-clicking them and selecting the Reassign option.
