Masks are an essential component for creating textures within Mixer. When used with game engines and offline renderers, these masks are vital for creating complex assets or large environments while optimizing texture memory usage or creating variations on the fly. Using masks can make iterations faster while giving full control over texel density in your DCC.
The Mask Export feature is a powerful tool that gives you the ability to export any mask made inside Mixer. Whether you want to export the mask of a layer, convert a paint layer into a mask, combine masks from different layers, or pack multiple masks into a single file.

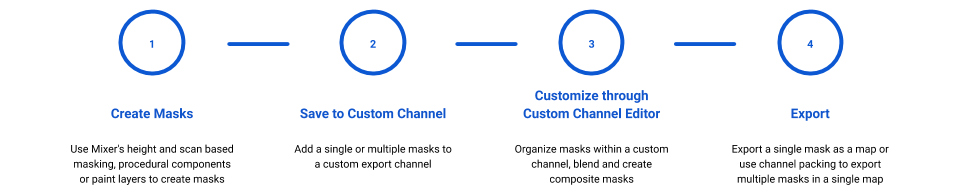
Mixer allows you to export any mask in a few easy steps.
To quickly get up to speed with Mask Exports, please see the following video.
Creating Masks
As mentioned in the Create Masks section, layers can be masked in different ways within Mixer, i.e., procedural masks, paint masks, or material IDs. When exporting masks, it is essential to note that the mask information in a layer results from height blending, opacity changes, UV/Placement settings, and any masks added to the layer. When selecting the mask information from a layer, the final result of a layer’s mask information will be sent to a custom channel.