At a glance, you will notice that the viewport occupies the major area of your screen and shows an empty plane there. The right panel by default takes you to the Setup tab and, under Model Settings, points to the Type, ‘plane.’ You can use the Type dropdown to access further options such as importing a Custom Mesh, a Megascans 3D asset, or a Shader Ball.
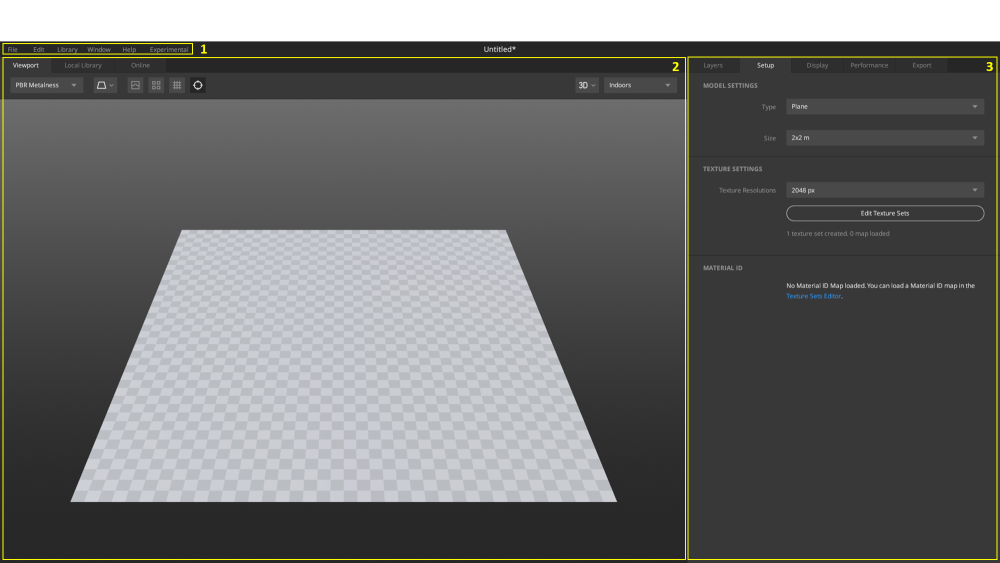
The following image and the numbered topics will give you an idea of the different aspects of the UI.
1. Main Menu: A quick access to
Mixer’s preferences, library settings, multiple features, and general options.
2. Left Panel: Occupying the largest
space on your screen, the viewport is where all the mixing and blending is showcased
with PBR values. Use the viewport controls to move between
local library or the viewport itself. Utilize multiple options to gain more creative
control over viewing of your surfaces or project’s model.
3. Right Panel: A control panel for
Mixer allowing you to set up your project, texture your models, and export for
further use.