Once you are satisfied with your textures in Mixer, it is time to export them to another DCC for further use. Mixer’s exports are primarily driven by the Export Target, which allows you to export to two different locations, and the following topic will assist you.
Locations
Following are the two different locations where you may want to export. Click the links to explore more details.
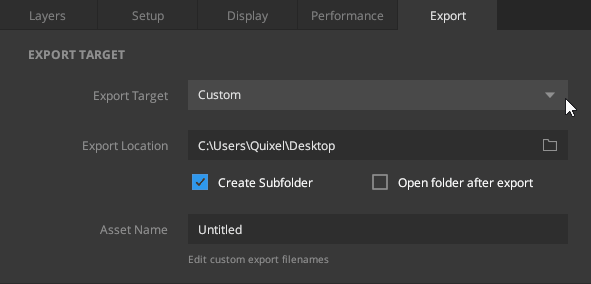
- Custom Exports: By picking a custom location on your disk, you can save your texture maps, models, or masks wherever you want.
- Export to Library: By selecting exports to a library, you can utilize the Quixel Ecosystem and take your textured components to another DCC such as Unreal, Maya, Blender, etc., with just a single click using Quixel Bridge.
a. Options
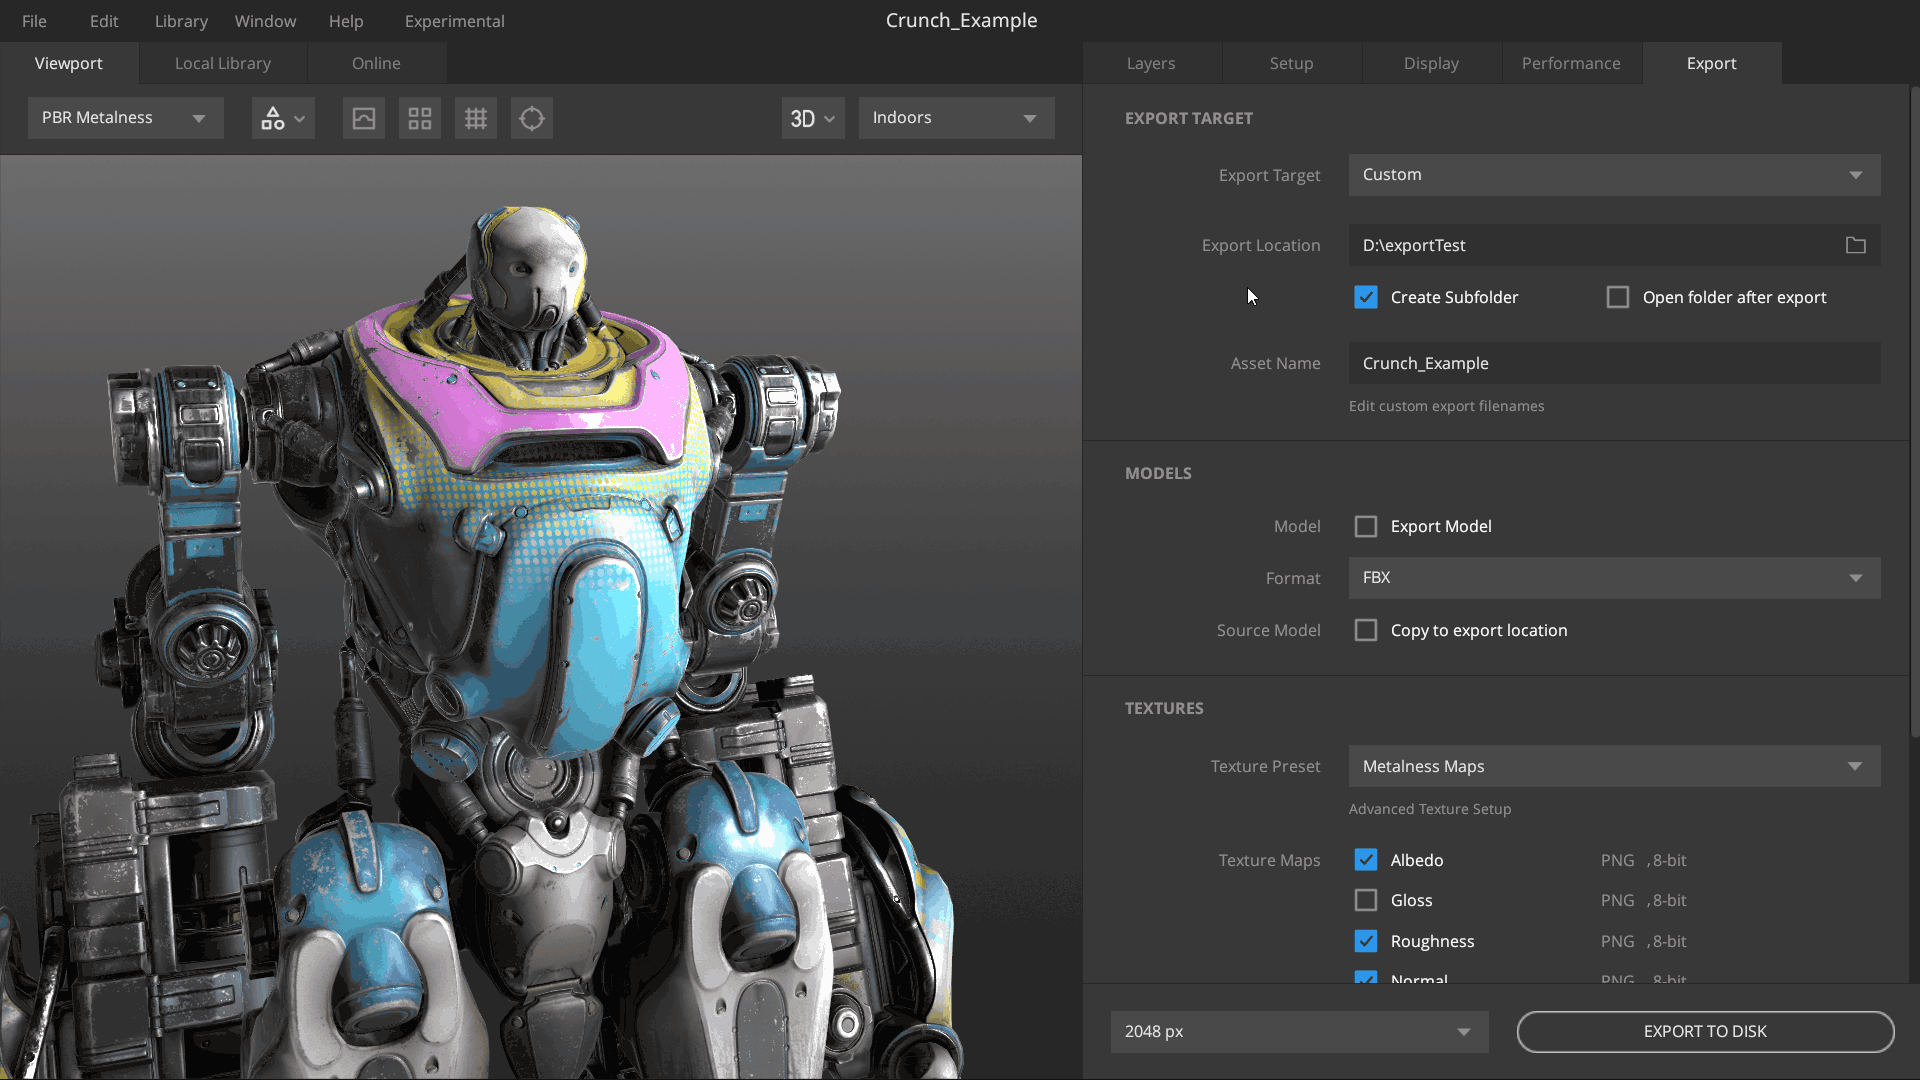
Let’s take a look at the options available to assist you in exporting to a location of your choice. At a glance, you’ll notice the Export tab in the right panel where the export options are available.
- Basic Export Settings: Basic options available in the main Export tab to help you export quickly. These are contextual to the Type selected under Model Settings in the Setup tab.
- Advanced Export Settings: Additional options available in the Advanced Texture Setup for gaining more flexibility with your exports.
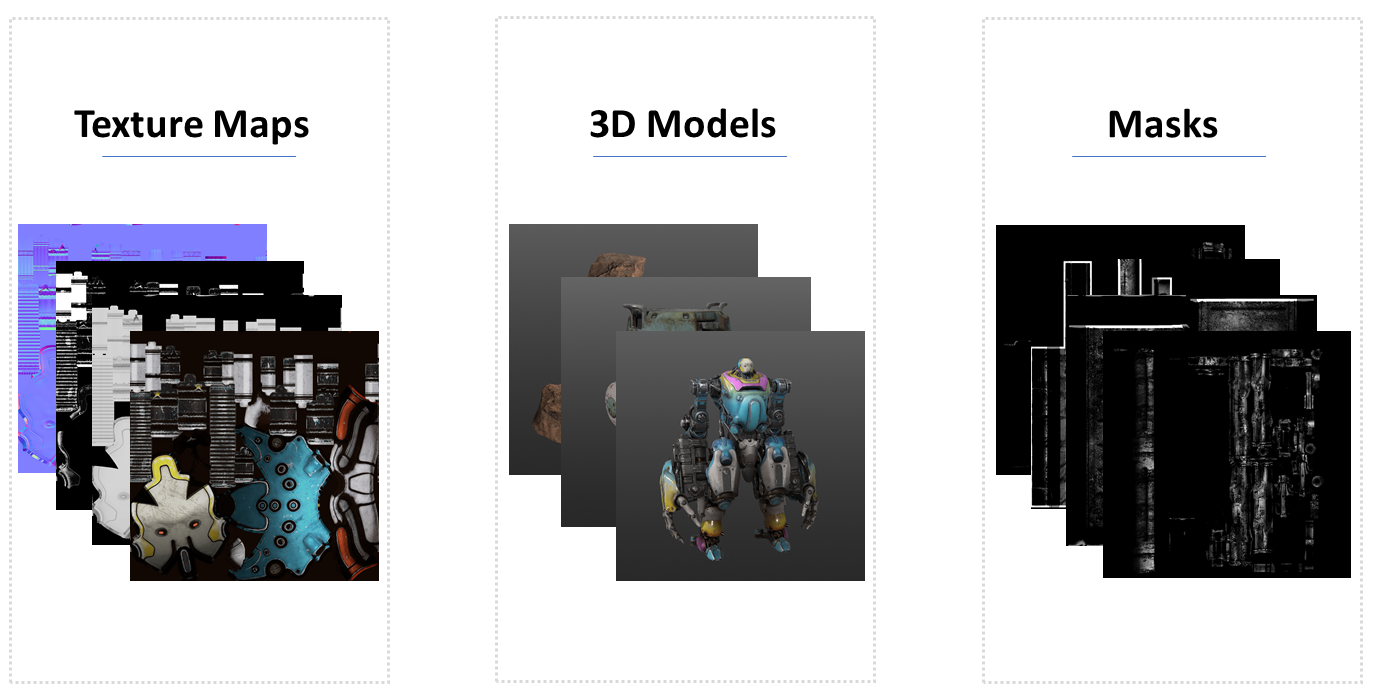
b. Categories
Let’s take a look at the different elements that can be exported out of Mixer.
- Texture Maps: Bake all the information available in the layer stack to PBR textures such as Albedo, Roughness, Metalness, Occlusion, Normal, Displacement, etc. You can do it for all model types, i.e., plane, custom, 3D assets from Megascans, and even the shader ball.
- Models, both Custom or Megascans: Export Megascans assets or your custom ones to a location of your choice.
- Masks: Utilized the Custom Export Channels feature? You can export masks quickly out of Mixer. Click here to learn more.