
Mixer allows you full control over the layer’s different channels, such as Roughness, Metalness, etc. This makes layers modular and highly customizable. The Channel list below explains which control each channel provides.

Solid, surface and atlas layer has the following channels available:
- Albedo
- Metalness
- Roughness
- Displacement
- Normals
- Occlusion
- Opacity
1. Albedo
Used in the Metalness workflow, this channel contains the color information of the surface.

Load: Load a map from your directory.
Reload:
This option is enabled when a custom map is loaded. Reload loads the image from the
same disc location.
Remove: Remove the loaded map.
Opacity:
Change the opacity of the channel.
Contrast: Increase or
decrease values of light and dark pixels
Match to Underlying:
Matches values of the map to the underlying layer
Invert Source:
Inverts the effect of map. This option is enabled when a map is loaded.
2. Metalness
Used in the metalness workflow, this greyscale channel contains the metallicity of the surface. A metallic surface’s specular reflection is created with color information from the Albedo map. A non-metal will use color information from the light. The more metallic a surface, the higher the intensity of specular reflections.
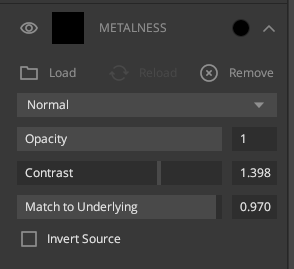
Load: Load a map from your directory.
Reload:
This option is enabled when a custom map is loaded. Reload loads the image from the
same disc location.
Remove: Remove the loaded map.
Opacity:
Change the opacity of the channel.
Contrast: Increase or
decrease values of light and dark pixels
Match to Underlying:
Match values to the underlying layer
Invert Source: Inverts
the effect of map
3. Roughness
This channel controls the light diffusion that is caused by surface irregularities. For the same amount of light, rougher surfaces will have broader specular highlights, while smoother surfaces will have sharper ones.
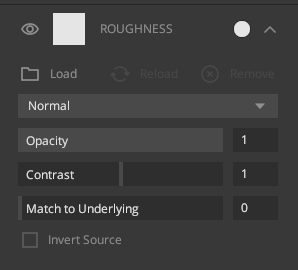
Load: Load a map from your directory.
Reload:
This option is enabled when a custom map is loaded. Reload loads the image from the
same disc location.
Remove: Remove the loaded map.
Opacity:
Change the opacity of the channel.
Contrast: Increase or
decrease values of light and dark pixels
Match to Underlying:
Matches values of the map to the underlying layer
Invert Source:
Inverts the effect of map
4. Displacement
A greyscale channel that determines how much the surface is displaced along the normals. Used alongside the normal map, renderers can displace the geometry for more realistic depth.
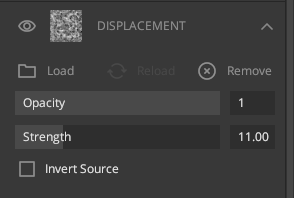
Load: Load a map from your directory.
Reload:
This option is enabled when a custom map is loaded. Reload loads the image from the
same disc location.
Remove: Remove the loaded map.
Opacity:
Change the opacity of the channel.
Strength: Increases or
decreases strength displacement
Invert Source: Inverts
displacement values
5. Normals
A normal map is a texture mapped to the surface of a model, which defines how directional light will reflect after hitting the surface. Each pixel in the image gives us normal information.
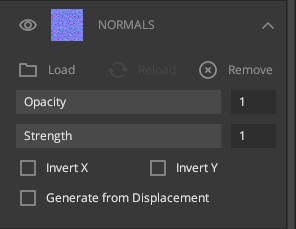
Load: Load a map from your directory.
Reload:
This option is enabled when a custom map is loaded. Reload loads the image from the
same disc location.
Remove: Remove the loaded map.
Opacity:
Change the opacity of the channel.
Strength: Increase or
decrease the strength of normals.
Invert X: Invert normals in
the X-direction.
Invert Y: Invert normals in the Y
direction.
Generate from Displacement: Generate normal map
from the displacement of that layer.
6. Occlusion
A greyscale channel that holds information for occluded areas to create shadows. These shadows add extra detail to the darker areas of your surface.
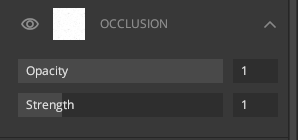
Opacity: Change the opacity of the channel.
Strength:
Increases or decreases the strength of occlusion.
7. Opacity
A greyscale map that holds transparency information. White areas are opaque, while black is transparent.
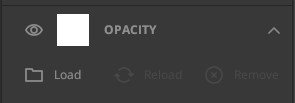
Load: Load a map from your directory.
Reload:
This option is enabled when a custom map is loaded. Reload loads the image from the
same disc location.
Remove: Remove the loaded map.