
In Mixer, you can paint on your Mix when using a Paint Layer or a Paint Mask. When either of these is added to your Mix, a Brush Panel will appear on the left of the viewport.
We will cover the Brush panel in 2 parts:
- Brush Panel Properties
- Managing your Brush Library
1. Brush Panel Properties
The Brush Panel properties has 6 sections:
- Brush Tools
- Brush Presets
- Brush Settings
- Brush Shape
- Brush Jitter
- Set / Brush Color
1. Brush Tools


There are two tools available, Brush and Eraser. By default, the Brush tool is selected. (Shortcut: B). Click the eraser icon to switch to the eraser tool (Shortcut: E).
2. Brush Presets
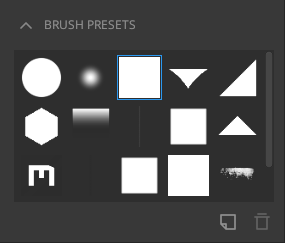
This panel contains all the brush presets a user has. Custom and downloaded brushes from Megascans library are both shown here. You can select your desired brush and start painting. From the bottom right buttons, you may either Save or Delete a new preset. The default presets that come with Mixer cannot be deleted.
3. Brush Settings

Size: Increase or decrease the size of your selected brush
Spacing:
Set the spacing between successive brush marks within one stroke.
Angle:
Set the angle of your brush you want to paint with.
Opacity:
Control the transparency or strength of the brush.
Flow:
Control the rate at which the brush paints.
4. Brush Shape
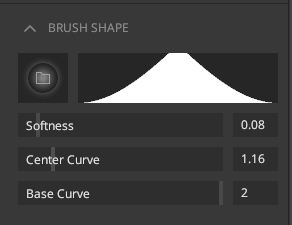
You can click the brush image to load a custom shape as an image to use as a brush. This new custom brush can be saved as a preset in your Mix. Custom presets can be deleted too. Read the Managing your Brush Library section on this page to download brushes and manage your Library.
When using the default circle brushes, these additional settings are available:
- Softness: Vary the radius of the maximum intensity.
- Center curve: Control the curve along with the brush.
- Base curve: Control the curve along the base of the brush.
5. Brush Jitter

Size Jitter: Adjust the jittery effect produced by the brush.
Angle Jitter:
Change the angle of the jittery effect produced by the brush.
Flow Jitter:
Adjust the speed of the jittery effect produced while painting.
6. Set / Brush Color
Depending on whether a Paint Layer or Paint Mask is selected, this section will have different settings. We will look at it in two parts:
- Set Colors (Paint Layer)
- Brush Color (Paint Mask)
1. Set Colors (Paint Layer)
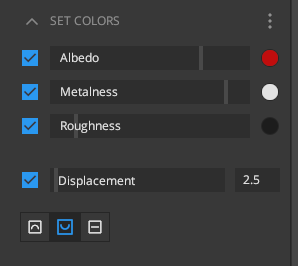
Control the Albedo, Metalness, Roughness, and Displacement of your brush here. Mixer allows you to set reflectance values to paint on the surface according to your requirements. Each of these channels can be toggled on and off.
- Albedo: Pick a color of the brush through this channel.
- Metalness: Use this slider to choose between metal or non-metal material properties.
- Roughness: Increase or decrease the roughness effect in your brush.
- Displacement: Set the displacement for your brush stroke. You can set your displacement to Raise, Lower, or Set . You can toggle between these options by using shortcut keys Z, X, and C.
Reflectance Preset:
The vertical ellipses on the top right of the ‘Set Colors’ section has built-in
presets. You can select any of the preset and paint on the surface.
2. Brush Color (Paint Mask)
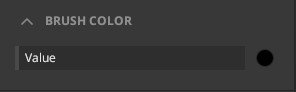
The Brush Color only has one control:
Value: Pick a greyscale
value to paint your mask.
2. Managing Your Brush Library
Mixer includes several default brushes, including two customizable circle brushes.
You can also load custom brushes and download more from the Megascans library. We
will look at the following 3 topics:
- Load Custom image as a Brush
- Saving Brushes
- Download Megascan Brushes
1. Load Custom Image as Brush
- Hover the mouse pointer over the brush thumbnail (as seen below) under the Brush Shape section.

- Browse to the brush image and select to load the custom brush into Mixer.

- The new brush will be loaded and is ready for use.
After loading a custom brush, it will not appear in your library until you save it.
2. Saving Brushes
![]()
To save a brush, click the Save icon located under the Brush Presets section and specify the brush’s name. The brush will now appear in the Brush Library and will retain its settings. You can save multiple versions of the same brush.
3. Download Megascans Brushes
- Go to the Online tab in Mixer and select ‘Brush’ from the filter drop-down.
- Select and download a brush.
- The new brush will appear for use in the Brush Library.
