
On this page, we’ll go through creating your first 2D Mix by blending three different materials and completely transforming their look and feel. For assistance, see Quick Start to make a new Mix with the default settings.
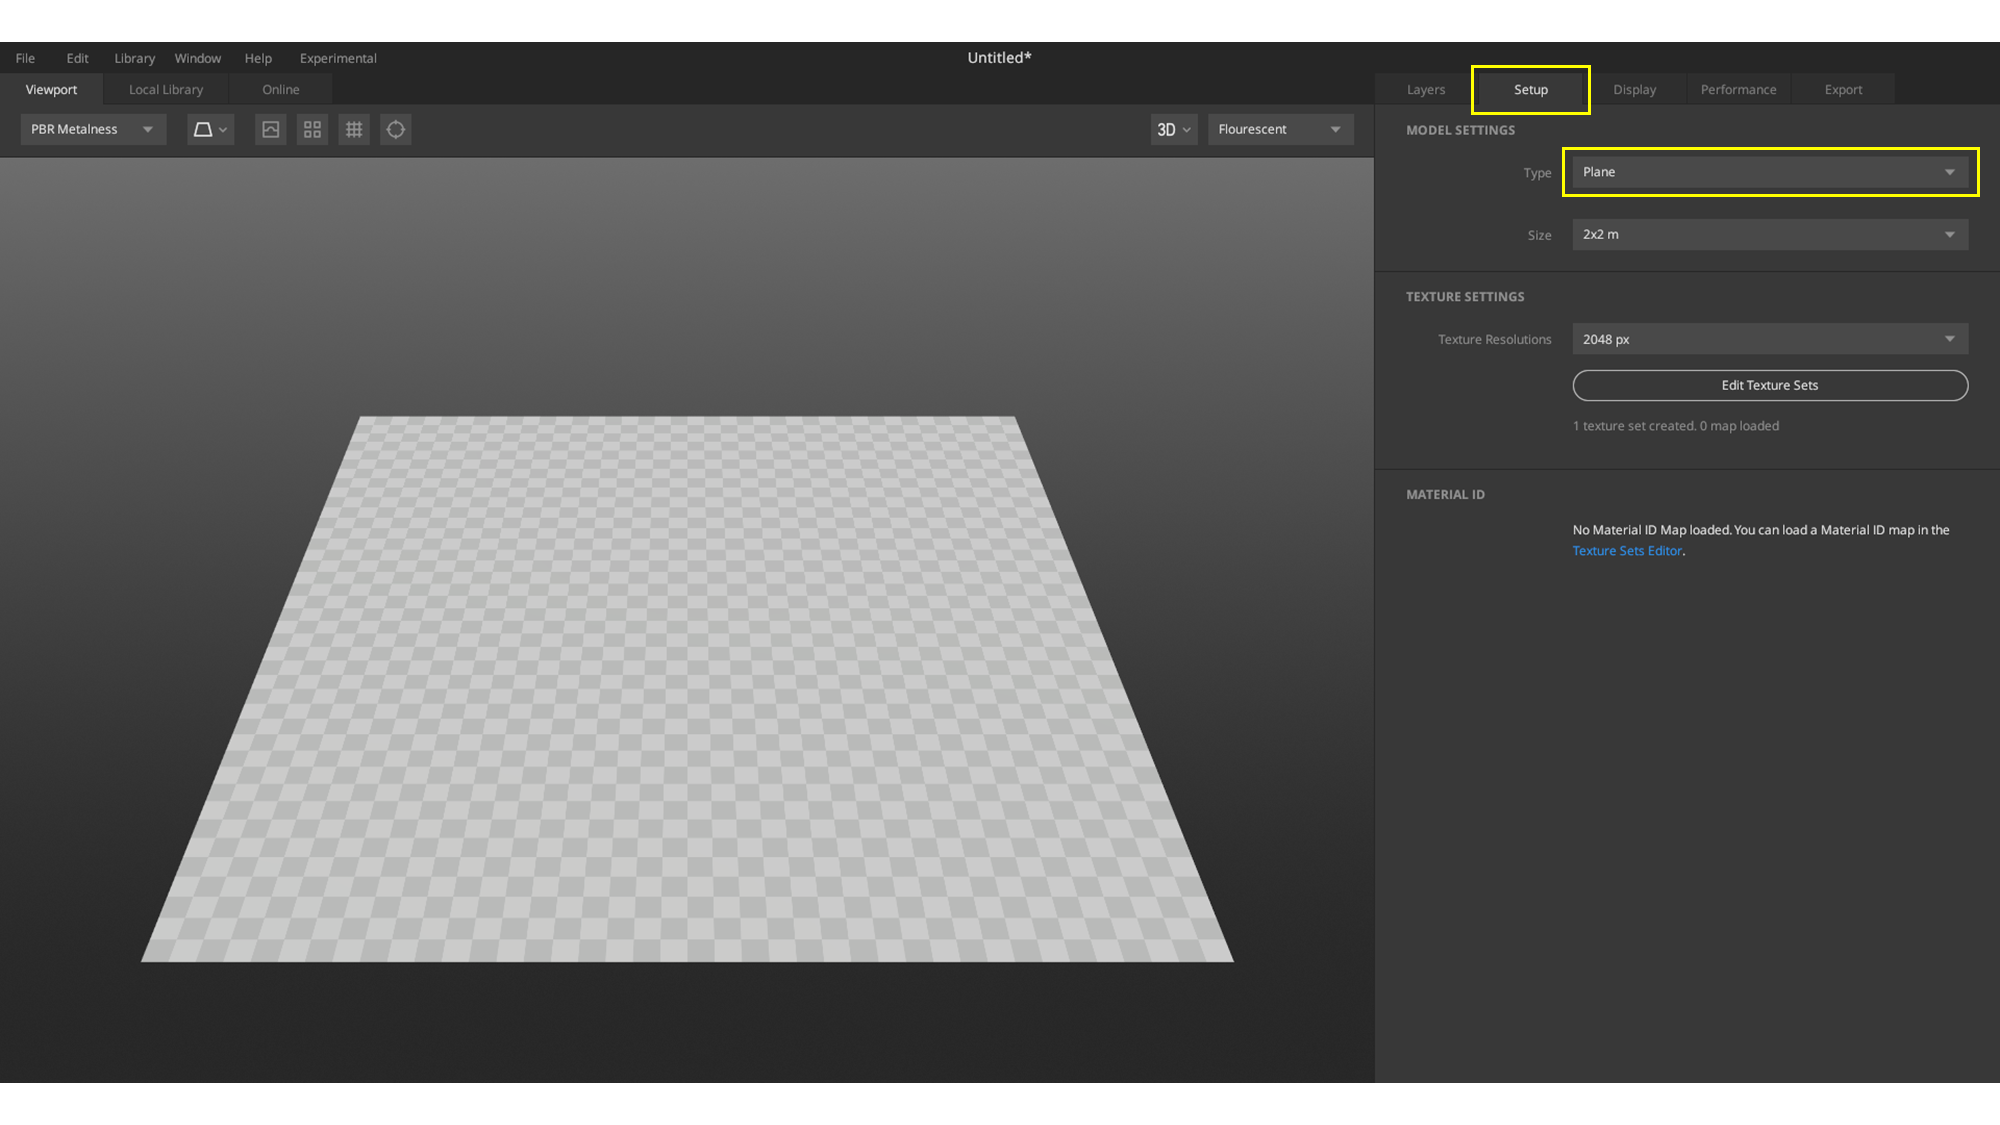
Once the quick, initial setup is completed, you will notice the Setup Tab selected by default in the Right Panel, where you can choose the type of surface or 3D mesh for texturing.
Here, the type ‘Plane’ is selected by default from the drop-down menu, which is just what we want to proceed with this example.
The First Steps
When you first create your project, you’ll be presented with a blank plane or canvas. To start blending materials, you’ll need to either click the Add Surface button at the top of the Layer Stack or click the Local Library tab to the top-left of the interface.

These actions will open up the Local Library tab, which contains all your downloaded Megascans assets and custom assets currently located in your local repository. To start this Mix off, let’s load an Icelandic cliff. You can find the asset you’re looking for either by searching for its specific ID, a general tag, or filtering the results by using the category and asset type filters.

By left-clicking on it, the asset will immediately be added to the project. Mixer comes with Height Blending options which assist in controlling the vertical displacement of the current layer. Learn more about the blending options here. If there is any surface underneath, adjusting the height slider will help you determine the extent to which an underlying surface may be covered.
This slider will really shine in the blending option when an additional layer is added. Once again, let’s click the New Surface Layer button to open up the Local Library tab. All new layers will automatically be added on top of the currently active or selected layer.
Blending Layers

Once the new soil material is loaded, let’s adjust its parameters to get a nice blend between the two materials.
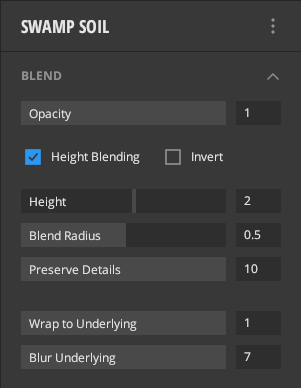
You can use the height information to blend layers together and adjust the height slider to an appropriate value for this layer. In addition to this, adjust the Radius and Preserve details sliders, both of which adjust the interpolation and interaction between the blended surfaces. Radius controls the tightness of the transition, and Preserve Details uses AO texture information to help preserve finer details from getting lost in the transition introduced by Radius.


By adjusting the Wrap to Underlying and Blur Underlying, you can adjust how tightly the current layer should conform to the underlying shapes and what level it should blur them.

We’ve already transformed the cliff material into a rocky forest floor with just a couple of clicks!

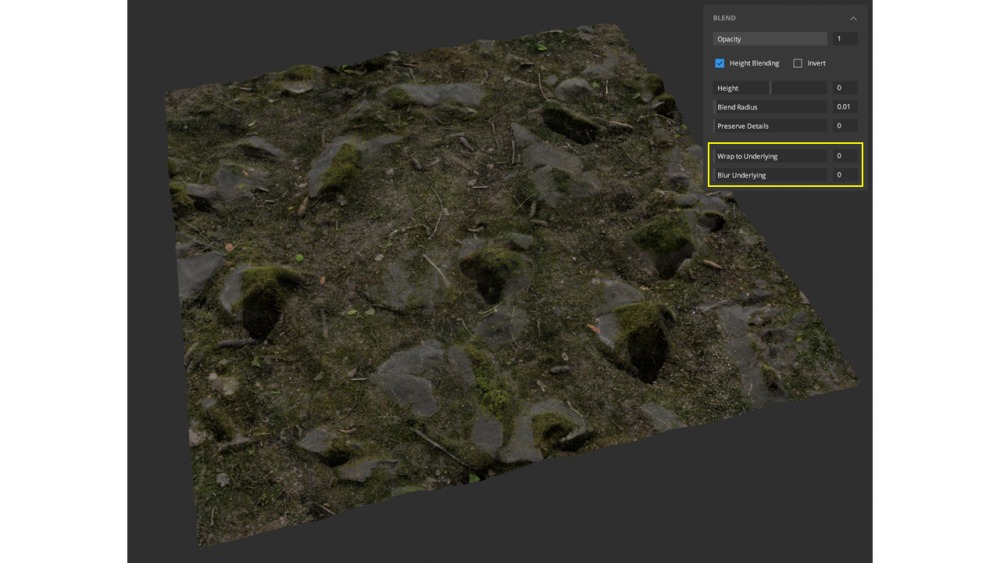
Let’s add another layer – this time, a moss material. As it’s moss, it makes the most sense to have it on the top of the rocks, so let’s invert the height blending and reduce the value so that it covers more of the surface.

For this layer, set both Wrap to Underlying and Blur Underlying a bit higher, so the moss conforms to the underlying shapes and softens the shapes as that’s quite a characteristic look for many moss types. Setting the Radius and Preserve Detail to a medium-low value will “spillover” just slightly to the surrounding areas.
Atlas Type Layers
It’s almost done! Let’s go ahead and add an additional type of layer – an Atlas Layer. You can do that by clicking the_ New Atlas Layer_ button at the top of the Layer Stack. This will bring up the Local Library tab with Atlas pre-defined as the asset type. If you need more Atlases, head over to the Online tab and look for more there.

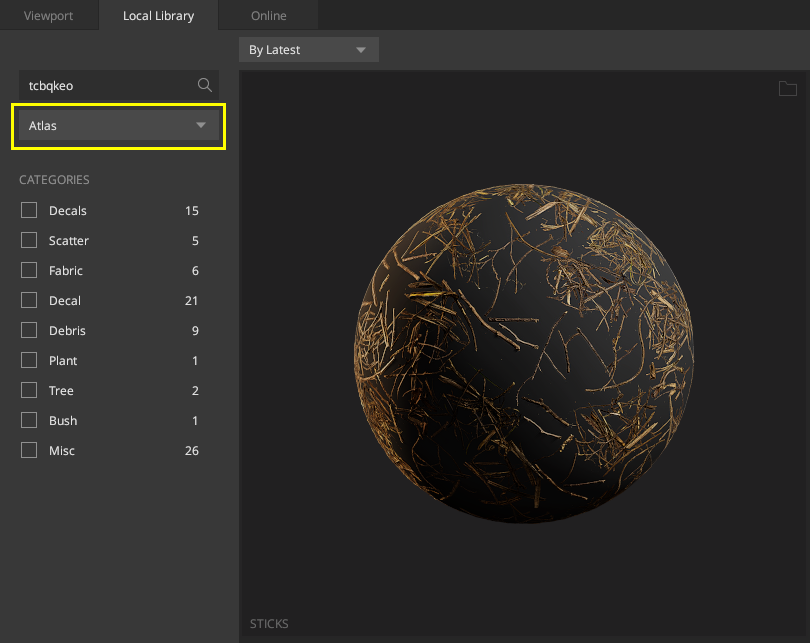
By default, any Atlas will be added with its Blend Mode set to Opacity Masked. In most cases, this is what you’ll want, but in our case, we’ll turn on height blending and very slightly increase the height values as we want the sticks to accumulate in the lower parts of the material due to gravity and wind. You can be quite liberal with the settings for this layer, but you can always reference the values below.

In just a few minutes, we’ve transformed an arid, Icelandic cliff into a Scandinavian forest floor using some of Mixer’s core features.

In addition to the massive Megascans library and all the custom assets you can add, there are so many more properties to tweak, several masks to play with, and painting tools to turn any basic Mix into whatever you want. See where your creativity takes you!