Selecting and setting up masks to export
Masks are a great way to texture assets within Mixer. However, you can leverage mask information in other DCCs too. Game engines and offline renderers have a wide array of uses for masks, allowing for quick customization of assets without retexturing them from scratch. When it comes to color tinting, distributing meshes, setting up fur and hair, or numerous other shader-driven techniques, masks play a vital role.
You can utilize Mixer’s existing masking features to add the effects for a particular project. However, to export that data out of Mixer, it will be necessary to add those masks or a combination of masks to a custom channel.
To add mask data to a channel;
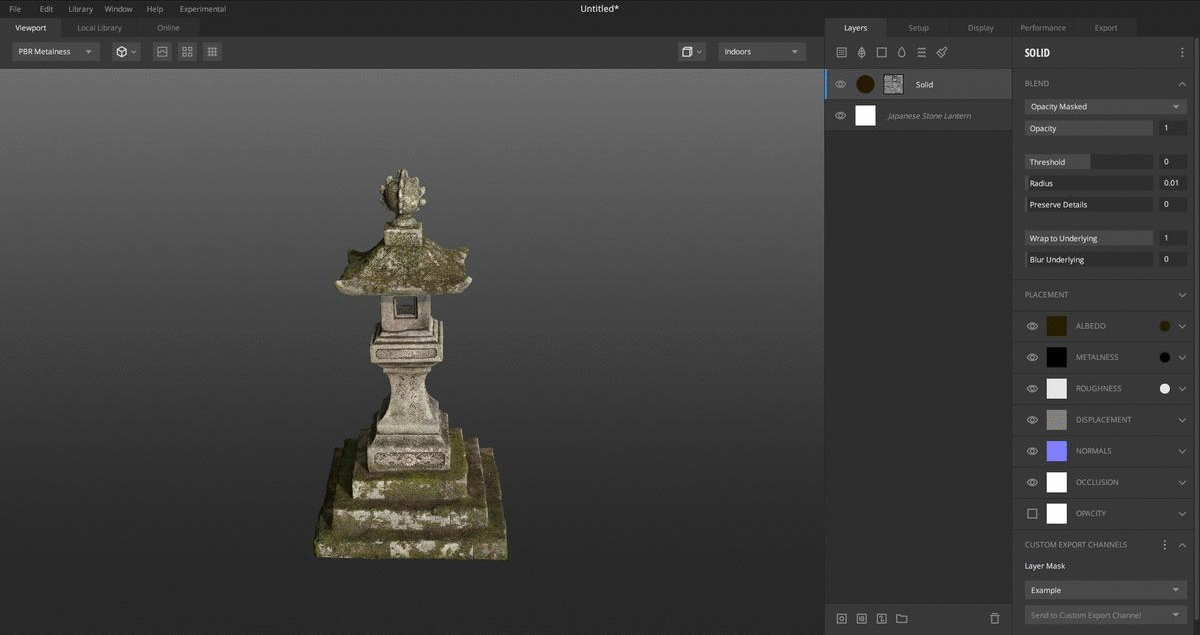
- select the layer which has the required mask information
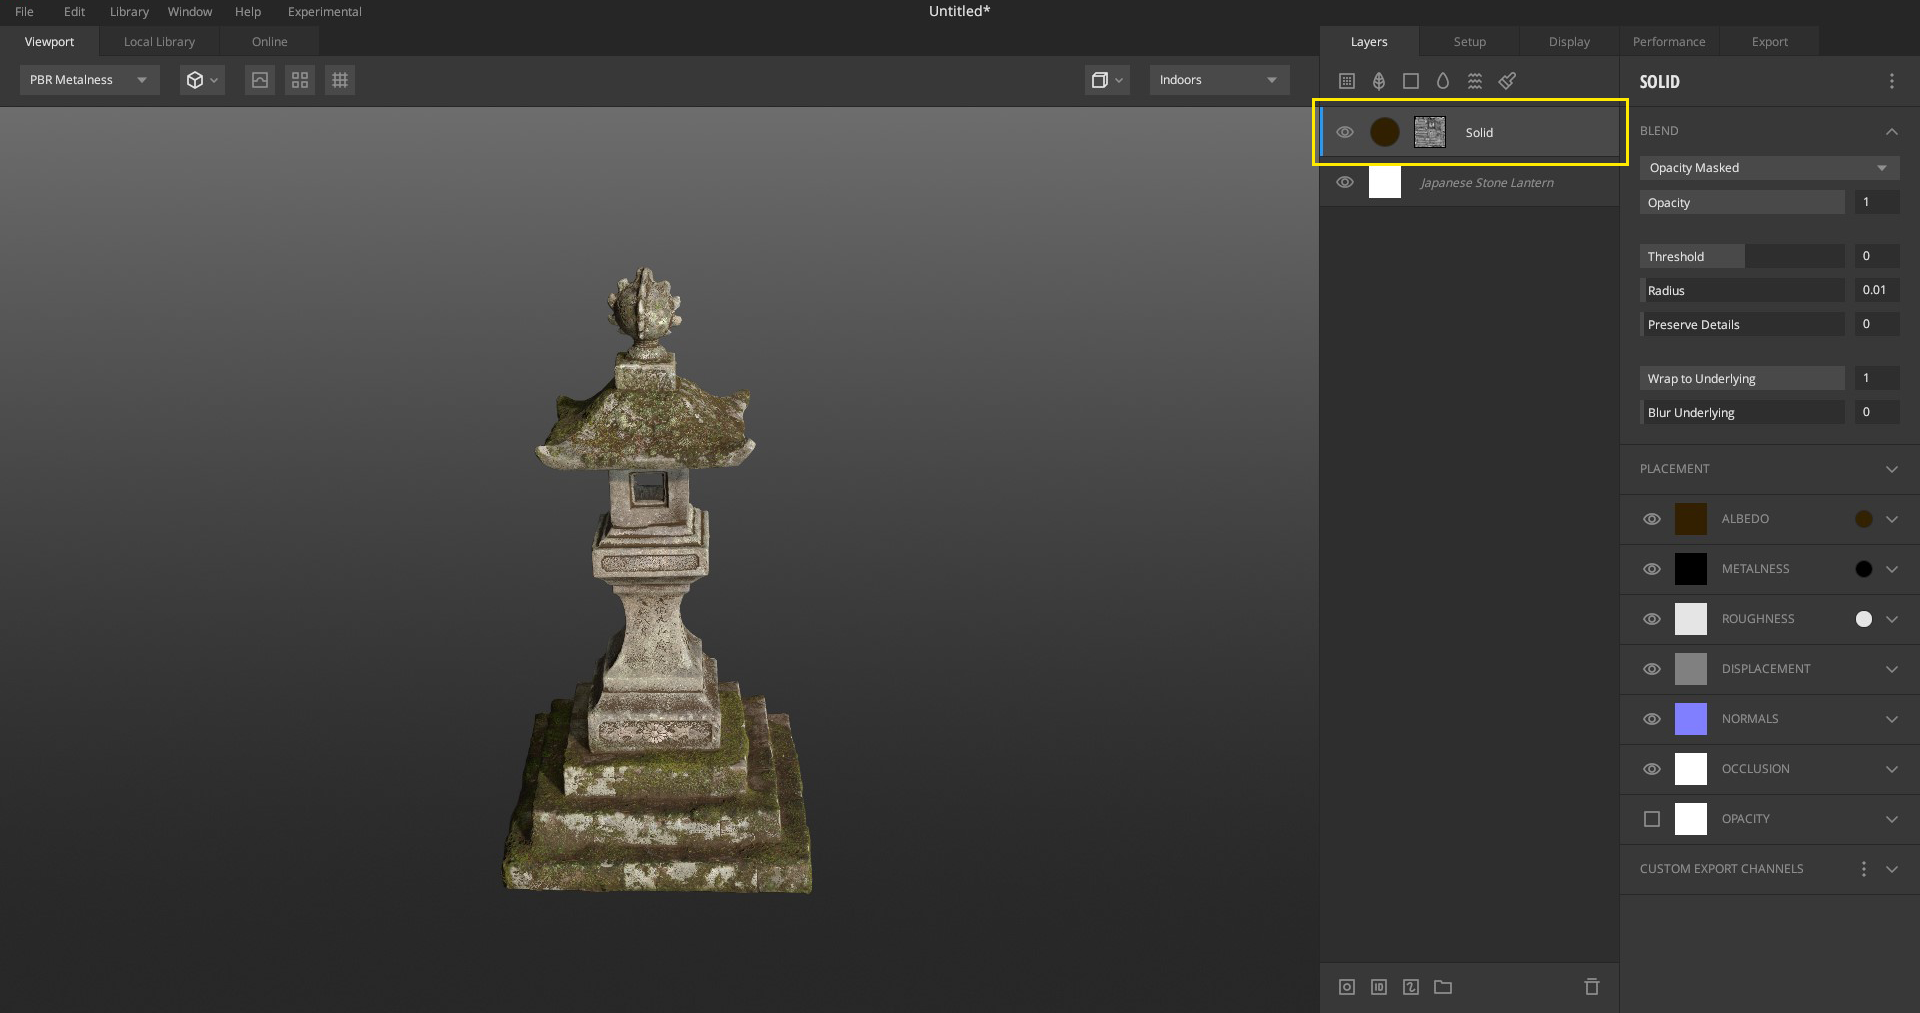
- Scroll down to the Custom Export Channel available at the bottom of the layer’s panel.
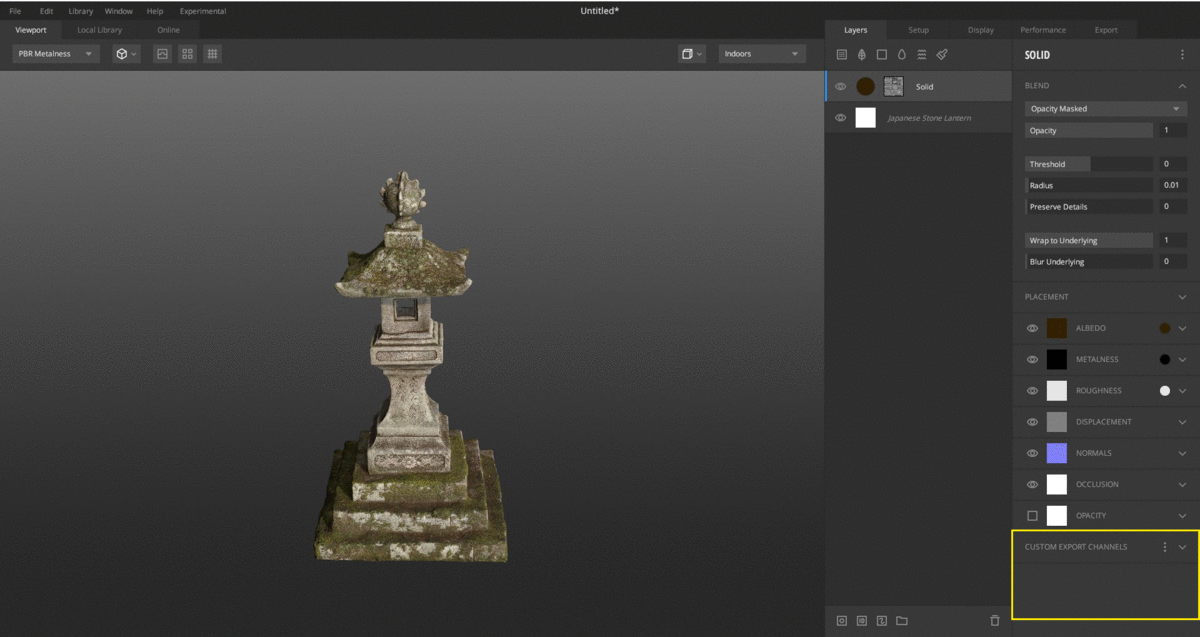
- Under the Layer Mask, select Add Channel from the drop-down
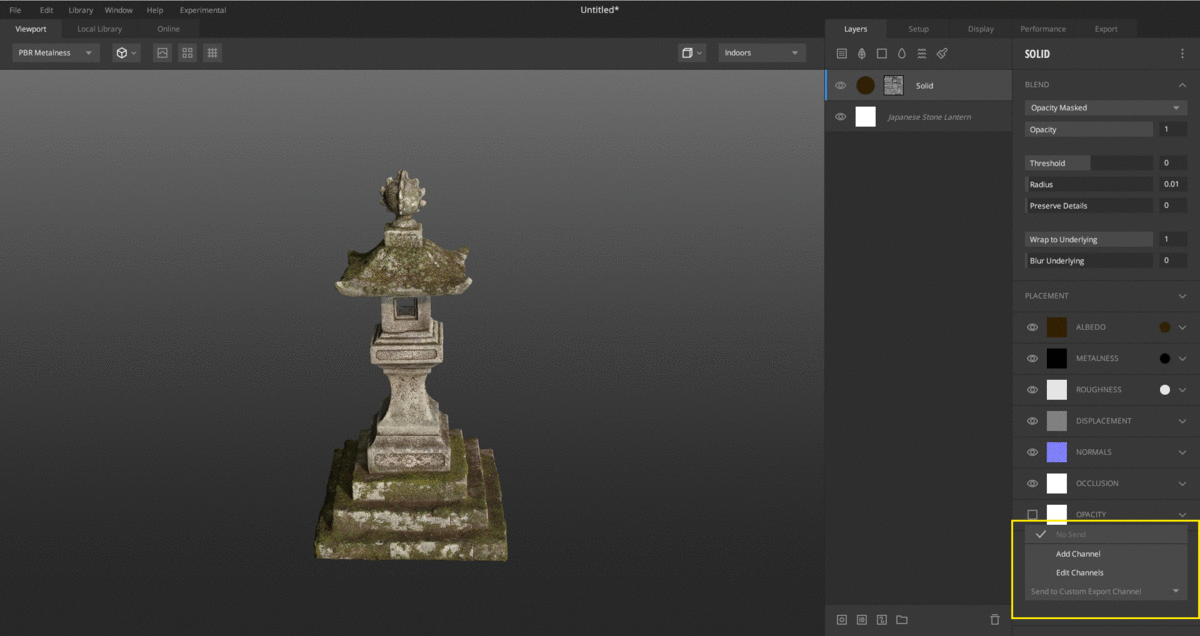
- When you hit Add Channel, enter the channel’s name in the “New Custom Export Channel” pop-up and hit save. In this case, the mask information has been kept by the name “Example” that is now visible in the custom channel list.

*In case the name already exists, a warning dialogue box will appear that
will take you back to the previous pop-up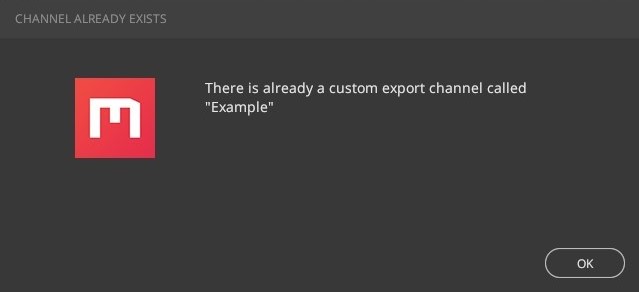
After the mask information has been added to the channel, the drop-down menu will be modified, and you will have two further options to work with
-
No send
The no send option will remove that layer’s mask information; however, the channel will still exist.