
The Texture Set Editor expands the Texture Settings further and offers additional options to set up your model. With the inclusion of Multiple Texture Set support in Mixer, this Editor will assist you greatly in setting up your Udims or Materials based Custom Model quickly and efficiently.
You can access the Texture Set Editor through the Window’s drop-down menu.

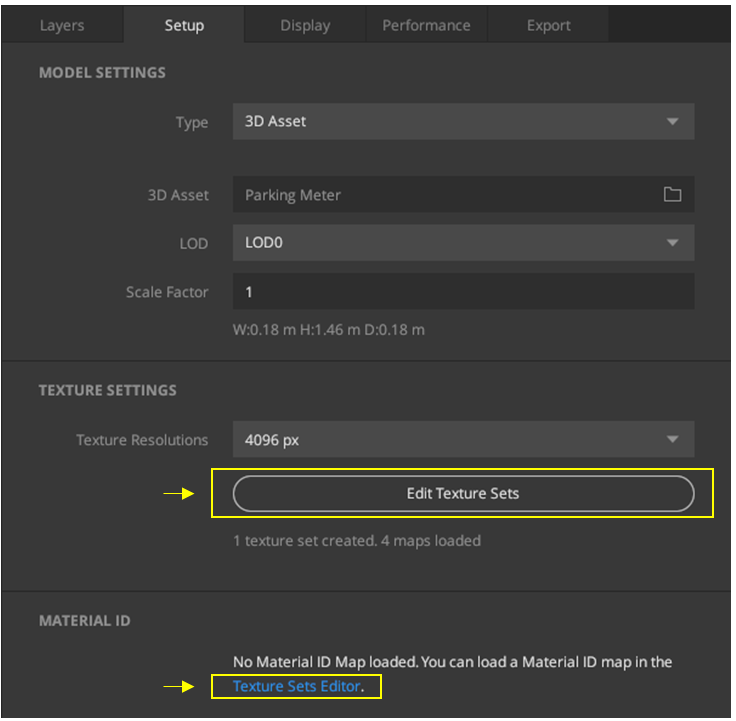
It can also be accessed through the Setup tab when you start a new project or open a mix to help you get started quickly.
The Editor is split into two parts.
- Texture Sets
- General
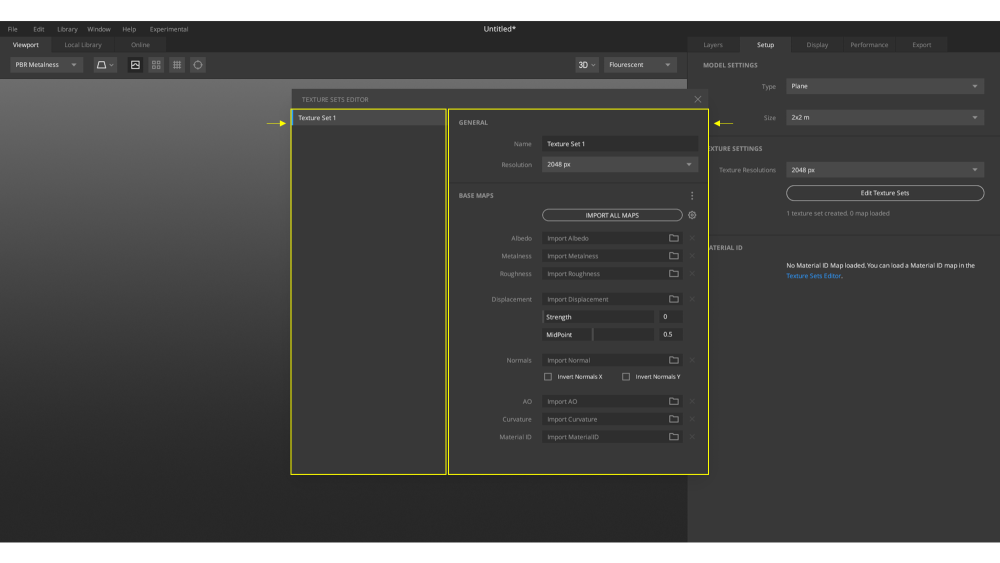
1. Texture Sets
The left side is used for Texture Sets and handles the number of sets based on UDIMs or Materials. In the case of a single texture set, only one set is shown by default.
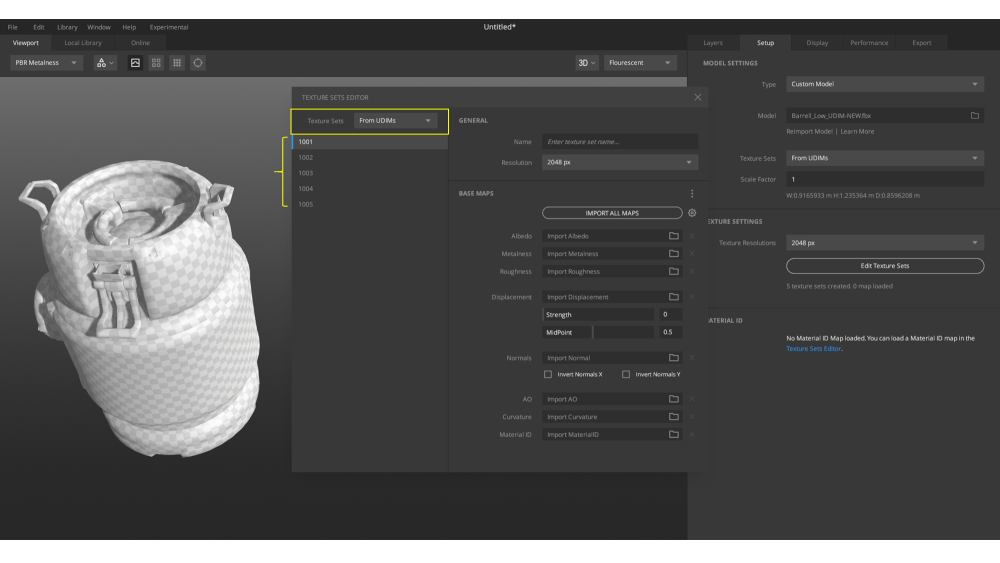
For models with multiple texture sets, Mixer helps you import and set up models based on two workflows, i.e., UDIM or material-based.
1.1. Materials
If a Material workflow is selected, the Editor will populate the material names. In the example below, you’ll notice that ‘Materials’ is selected from the drop-down menu, and it is populating a list based on how they were set up in the modeling DCC. In the image below, Crunch (available in sample mixes) has been loaded to highlight how the Editor will update itself to reflect the composition of the model.

1.2. UDIMs
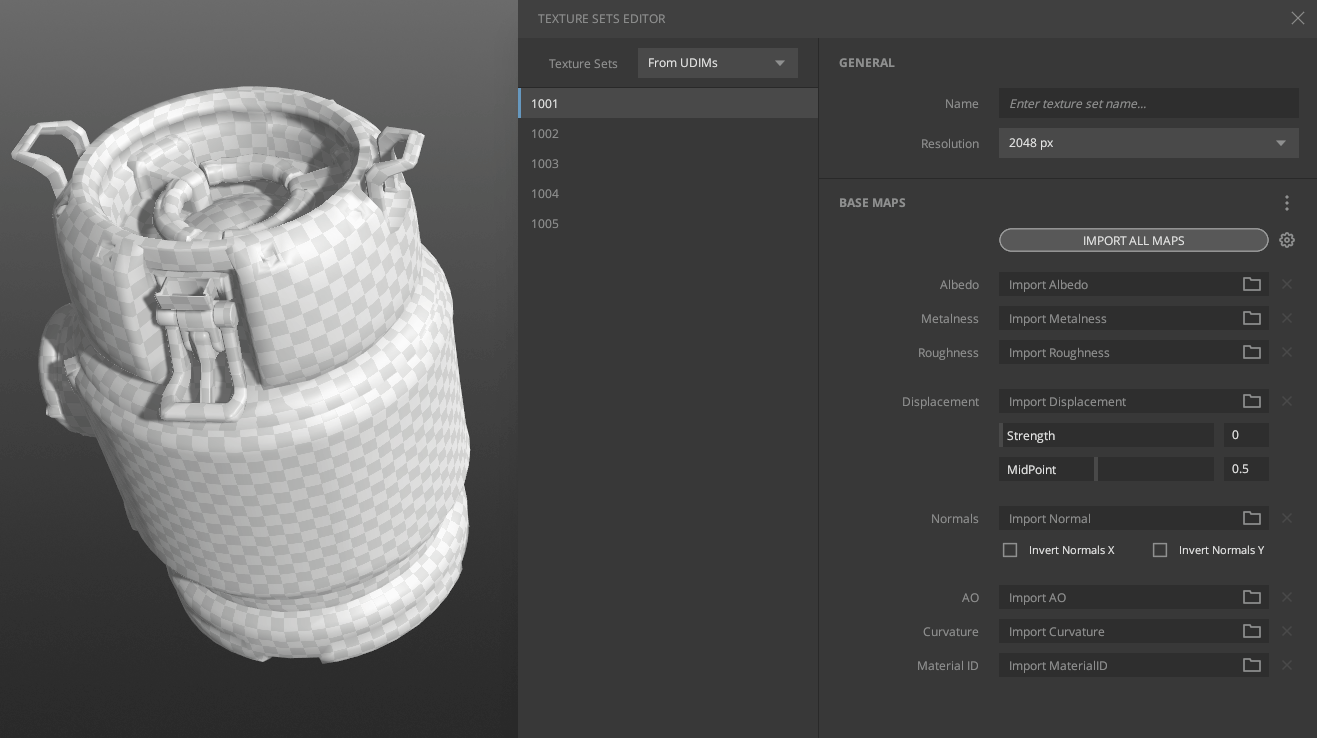
If a UDIM based model has been selected, the Texture Set Editor will reflect the UDIM numbers in the list on the left. In the image below, a UDIM based model (available in sample mixes) has been loaded to reflect the number of UDIM tiles available with the model.
2. General
The right side or ‘General’ settings contextualize the Texture Set selected from the left and can be used to rename the texture set, set the working resolution, and load base maps manually or automatically into the corresponding slots.
Clicking on a texture set within the Texture Set Editor will flash the corresponding mesh part. The flash can be used for visual assistance as well as naming UDIMs within the Texture Set Editor.
2.1. Load All Maps
For models with a couple of texture sets, a Load All Maps function has been added to assist in auto-populating base maps for each set instead of spending time to do so manually. To elaborate further, if you have five texture sets, each containing 5 maps, a total of 25 maps will have to be imported manually, which may be tedious and time-consuming. However, by naming your maps with the proper suffix or prefix and configuring the Auto Load Map Names, you can load your maps with a single click.

2.2. Customize Autoload Map Names
To assist you in customizing the affixes, the settings icon
![]() next to the Load All Maps button can show the default terms already in place and is
editable for you to add new ones.
next to the Load All Maps button can show the default terms already in place and is
editable for you to add new ones.
While autoloading, please note:
- UDIM MTS case: It searches for maps matching names like albedo + the UDIM number
- Material MTS case: It searches for maps matching names like albedo + the name of the texture set
- Single TS case: It searches for maps matching names like albedo

Once the affixes within the map names are confirmed, use the “Load All Maps” button to navigate to the folder containing the maps baked in an external DCC to begin the import process. Once completed successfully, each map type is loaded to its corresponding slot.
![]()
2.3. Base Maps
Before the inclusion of Multiple Texture Set support in Mixer, baked maps were added to a Base Layer that existed within the layer stack. The Base Layer has now been replaced by Base Maps that you can add through the Texture Sets Editor.
