
In the Layer’s tab of the Right Panel you will notice some icons on the top and bottom of the layer stack.
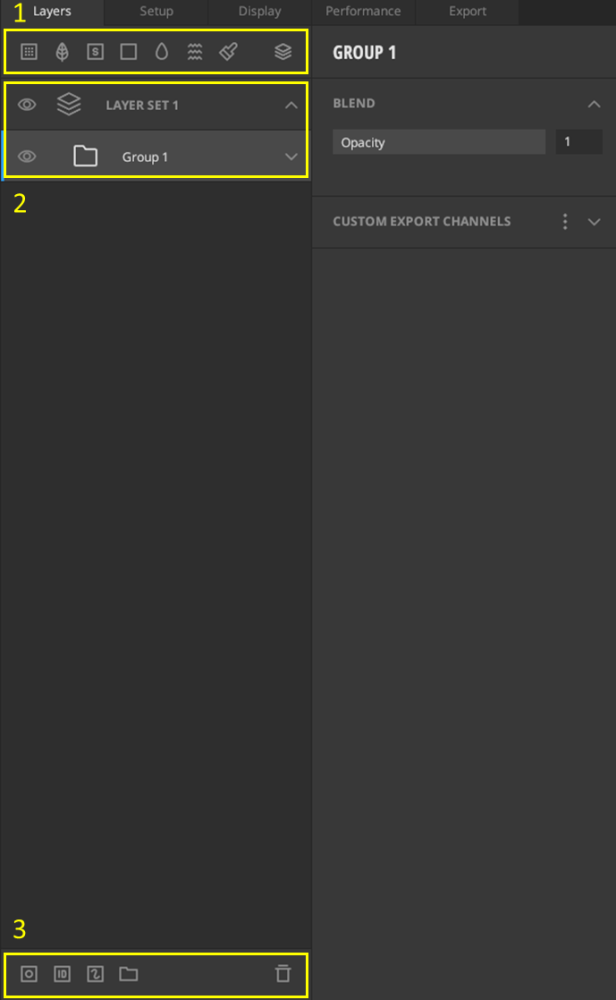
1. The first seven icons at the top of the layer tab correspond to the different Mixer layer types available, as shown below.
| Icon | Layer Name | Description |
|---|---|---|

|
Surface Layer | Click to show all surfaces in your Local Library. Select one to add it to your Mix. |

|
Atlas Layer | Click to show you all atlases in your Local Library. Select one to add it to your Mix. |
|
|
Smart Material | Click to add a smart material to your Mix. |

|
Solid Layer | Click to add a solid layer to your Mix. |

|
Liquid Layer | Click to add a liquid layer to your Mix. |

|
Noise Layer | Click to add a noise layer to your Mix. |

|
Paint Layer | Click to add a paint layer to your Mix. |
2. The following two layer types exist to assist you in managing the aforementioned layers within the stack. Apart from these unique layers to assist with organization, please see Layer Controls for additional options.
|
|
Layer Set | Click to add a Layer Set to your Mix. |
|
|
Layer/ Mask Group | Layer groups assist you in managing different layer types within the stack. |
3. The icons at the bottom help in applying and deleting masks and groups on the layers mentioned above.
| Icon | Icon Name | Description |
|---|---|---|

|
Mask Stack | Click to add a mask stack to the selected layer. |
|
|
Material ID Mask | Click to add an ID mask through which you can assign a material ID to the selected layer |
|
|
Paint Mask | Click to paint a mask on this layer. Add ‘Alt’ for a black paint mask. |
|
|
Group | Click to create a group folder where layers can be moved to or click multiple layers and click this icon to move those layers to a group automatically. |
|
|
Delete | If a layer is selected, this will delete the layer and any mask appended. If only a mask is selected, this will delete the mask but not the layer |