
When you access the export tab, the default settings will be set for custom exports. The available settings are contextual to the Type selected under Model Settings in the Setup tab.
You will notice the following main sections in the Export Tab:
- Export Target
- Textures
- Models (when you have opted to work with 3D models)
1. Export Target
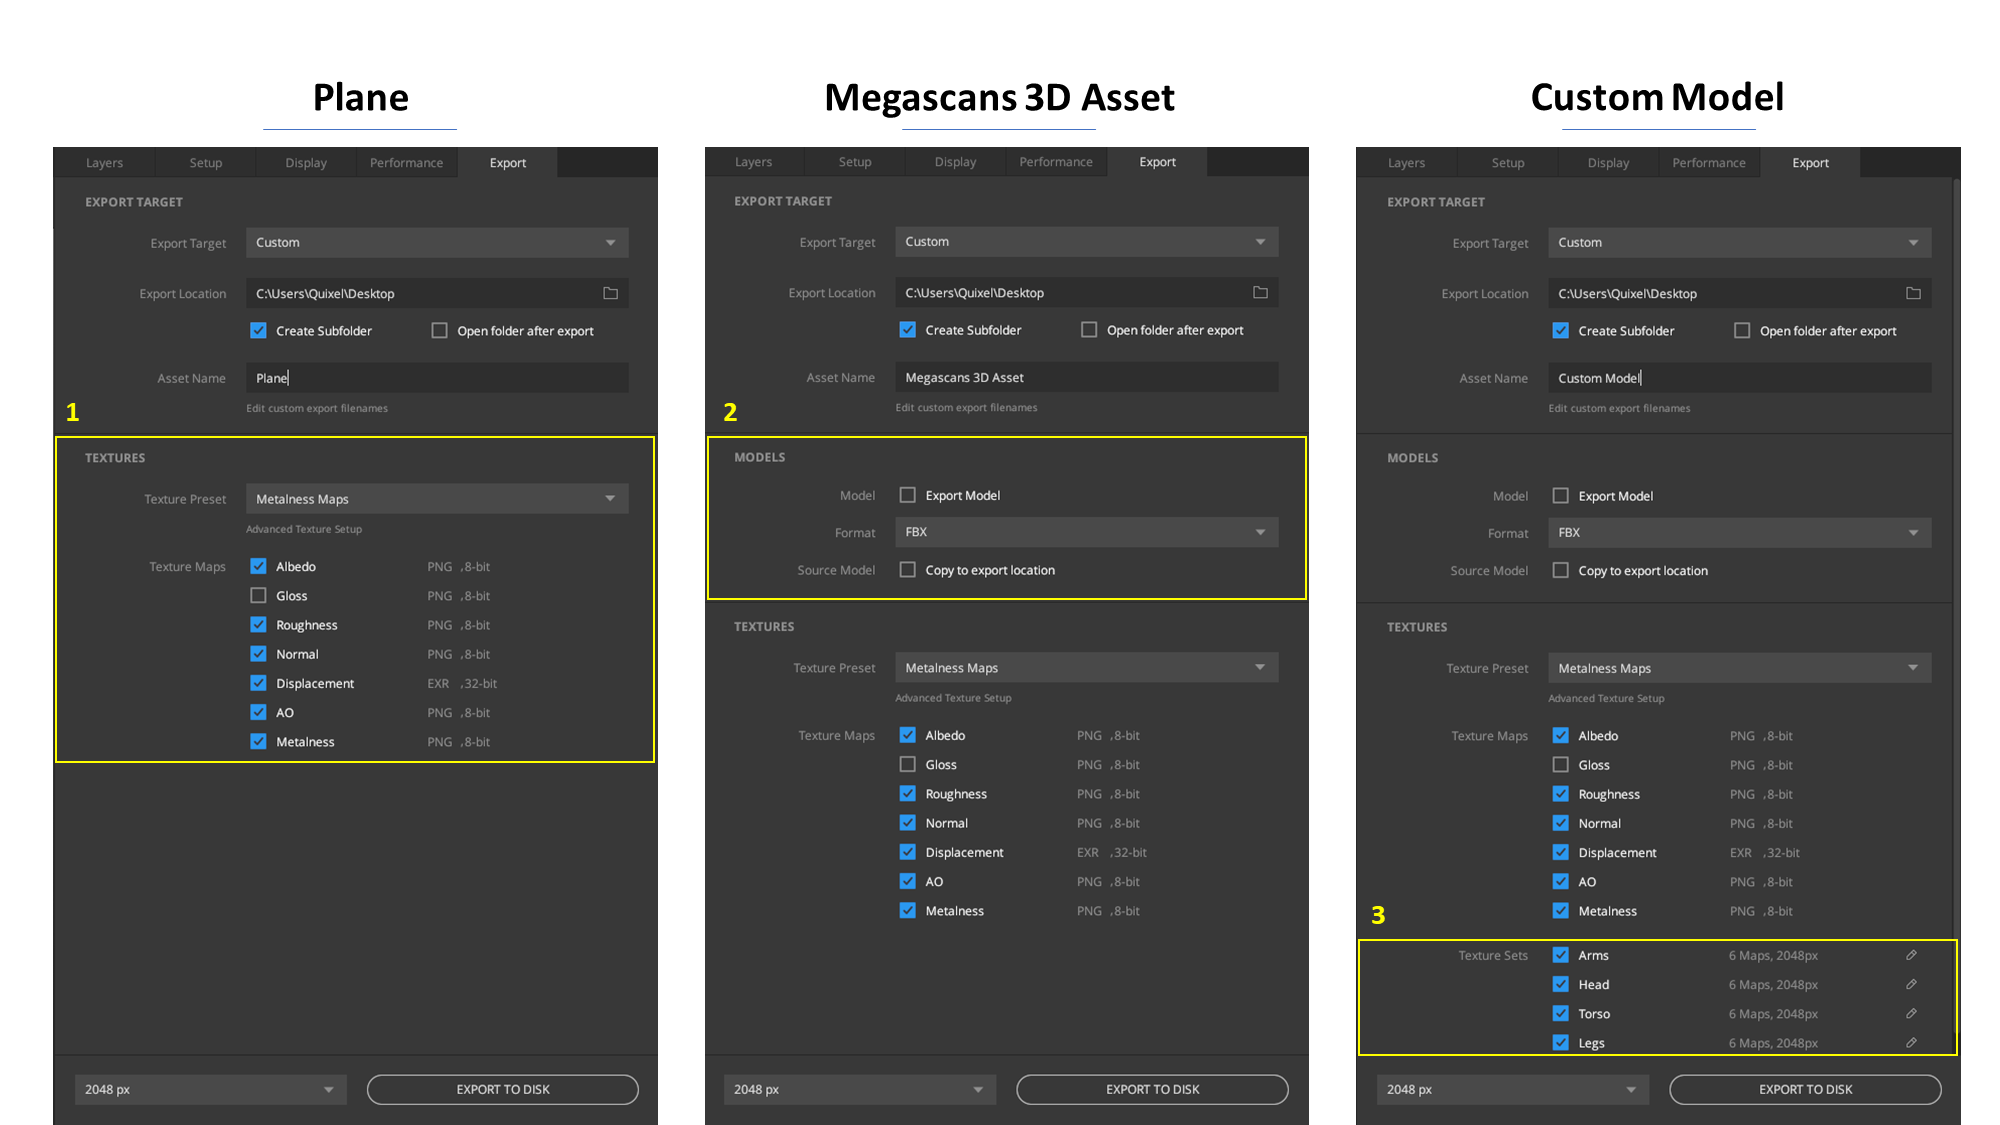
Since the basic export settings are contextual to the selected model type, the following image compares the change in options.
Plane: The default selection in the Setup tab will only have the
(1) Textures section available when switching to the Export tab.
The Textures section is common for any selected type.
3D Asset: You’ll notice that when switching to 3D models, another section
(2) Models is now available with additional options.
Custom Model: If your model carries multiple texture sets, the Textures section will expand
further and reflect the options to export those (3) Texture Sets.
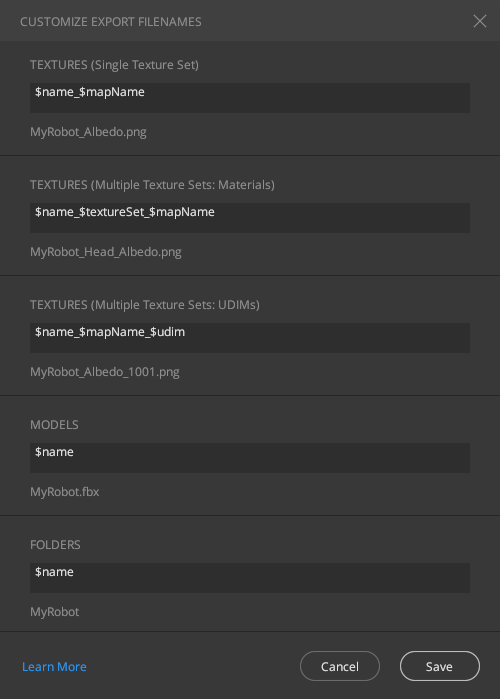
For custom mixes, apart from assigning a name to the mix, you can further customize the filenames for texture maps by clicking on ‘Edit custom export filenames’ located right under the Asset name’s field.
a. Edit custom export filenames
By accessing the custom export filename’s popup, you will have the option to use a naming convention for your filenames that suits you best, or if you’re working in a team, it can be set to your team’s preferred format.
You will notice that you have the option to customize the filenames for single texture sets, multiple texture sets (Udims or Materials), models, or even folder names.
2. Models
In case 3D Assets from Megascans or Custom models were selected from the Setup tab, this section will become visible in the Export tab allowing you the following options.
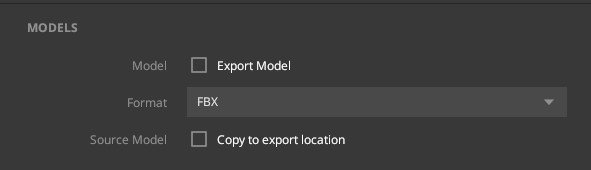
a. Export Model
Check this option if you want the 3D asset or Custom model to be placed in the same folder as the texture maps. This is useful if you’ve applied a scale factor to the model.
b. Format
Select a format for the model from the list while exporting.
c. Copy Source Model
This option copies the model from the original source to a custom location without any changes made in Mixer.
3. Textures
This section will determine the composition of the maps that you will export, such as their format, bit depth, texture set, resolution, etc. In the case of Multiple Texture Sets, an additional list comprising of the model’s Texture Sets will be visible, allowing you to select which collection of maps should be exported.
Right under the preset’s dropdown, you will notice an option for ‘Advanced Texture Setup,’ for even more advanced options for exports. Click here to learn more.
a. Texture Presets
Based on your preference, you can select presets that can quickly help toggle between metalness or specular workflows using the ‘Texture Preset’ dropdown. Choosing either one will automatically update the texture maps list below that uses maps specific to that workflow.
You can also create custom presets that export the maps based on your preference by accessing the Advanced Texture Setup. That custom preset will also be visible in the Texture Preset dropdown.
b. Texture Maps
Mixer allows you to export numerous texture maps. From here, you can select which maps should be included in the export folder. You’ll also notice the file format and the bit depth at which they will be exported. To reset the selections, select the same preset again. To change the file format or bit depths, click on Advanced Texture Setup.

c. Texture Sets
The list here is based on the Texture Sets generated either through materials or UDIMs for your model. You can choose which collection of maps can be exported by selecting their Texture Sets through the checkboxes.

You will also notice further information regarding the number of maps, their resolution, and an edit icon corresponding to each Texture Set. These can be edited through the Advanced Texture Setup.
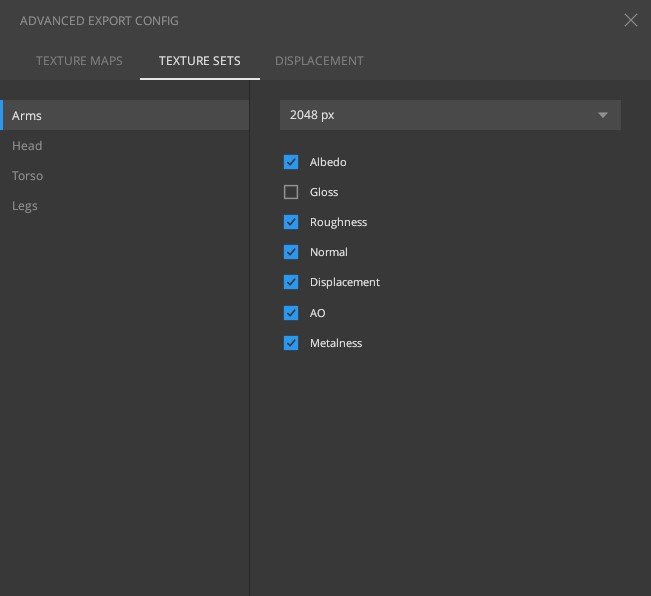
d. Advanced Texture Setup
For more control over your exports, click on the Advanced Texture Setup. This topic is covered in more depth here.
4. Export to Disk
Once you’re satisfied with your export options, click the Export to Disk button to export your mix to the specified location and with the selected resolution.

Please note that if you have selected different resolutions for different texture sets, the drop-down will indicate ‘Multiple Resolutions’ instead of a single resolution.
