
As one of Mixer’s primary methods for creating Mixes, you’ll blend between both layers and masks. Blending is the process of combining the two layers and adjusting how they interact. This page contains information on each blending mode available in Mixer.
The video below explains the blending concepts in an older version of Mixer. The concepts are still the same and will help you grasp the following points quickly.
Blending can be covered in two parts:
- Surface, Atlas, and Solid Layers
- Mask Stack
1. Surface, Atlas, and Solid Layers
These three-layer types support blending with the underlying layers. You can find blending options in the “Blend” section of the layer’s properties.
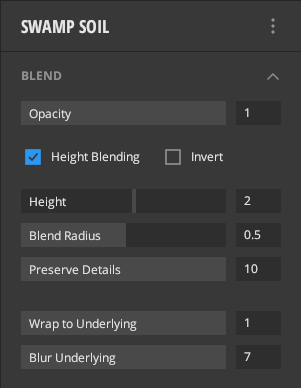
There are two main ways when blending: either using the height data or blending based on opacity.
Opacity:
Control the transparency of the layer.
Height Blending:
Control the vertical displacement of the current layer.
- *When toggled Off: Blend the layer based on the opacity instead of its height information. Atlas layers are set to this mode by default. When working on a 3D asset, any new layer will be set to opacity masked by default.
- *When toggled On: Use the height information to blend layers together.
Invert:
- *When toggled Off: The current layer will blend from below the surface. This means the current layer will come up from below. Surface and solid layers are set to this mode by default.

- *When toggled On: The current layer will blend from above the surface. This means the current layer will come down from above.

Blend Radius:
Control the fall-off or the smoothness of the blending at the intersection points between the two layers.

Preserve Details:
Controls the radius effect’s underlying layer’s detail preservation based on the ambient occlusion (AO) information in the Mix. Increasing this will allow more high-frequency details through the current layer’s detail of its edges.
Wrap To Underlying:
Control which layer’s height information to preserve. If set to maximum, all height information will come from the layer below. If, at minimum, all height information will come from the current layer.

Blur underlying:
Blurs details of the underlying mix.
2. Mask Stack
When a mask stack is added to a layer, you can add mask components and modifiers to it. When more than one mask is added, they can be blended using different blend modes provided. Click here for detailed information on all the blends modes.
